


こんばんは。最近ようやく機械学習のキャッチアップをはじめた齋藤です。
何から始めていいかわからなかったので、とりあえずAmazonでそれなりの評価のついていたこちらを購入しました。
現場で使える! TensorFlow開発入門 Kerasによる深層学習モデル構築手法 (AI & TECHNOLOGY)
毎日少しずつ読み進めていきたいと思います。
さて今回はLINEBotをいじってみたので備忘録的な形で記事に残そうと思います。何番煎じかわかりませんが…やったことをつらつらと書いていきます。
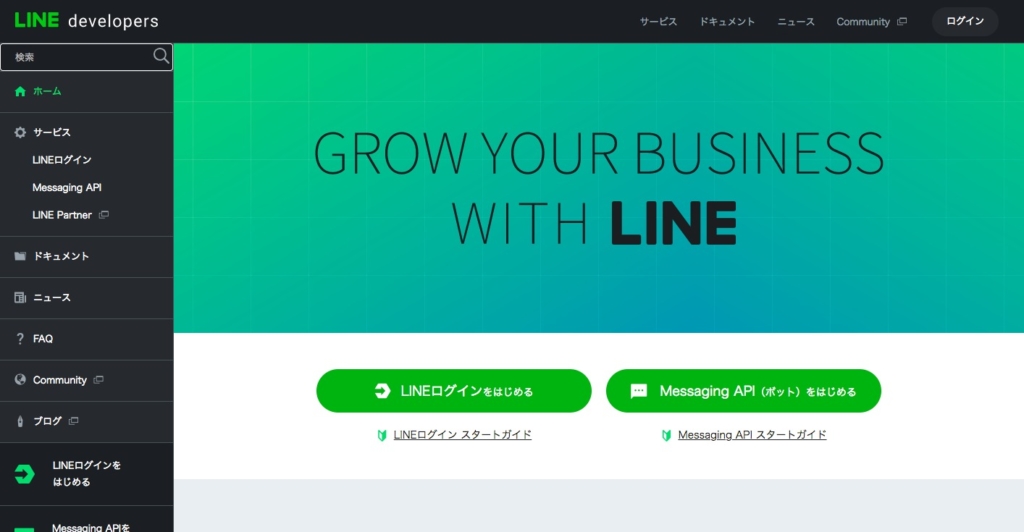
LINE developersでの設定
https://developers.line.me/ja/
ここのMessaging APIを始めるからアカウント(チャンネル)を作ります。
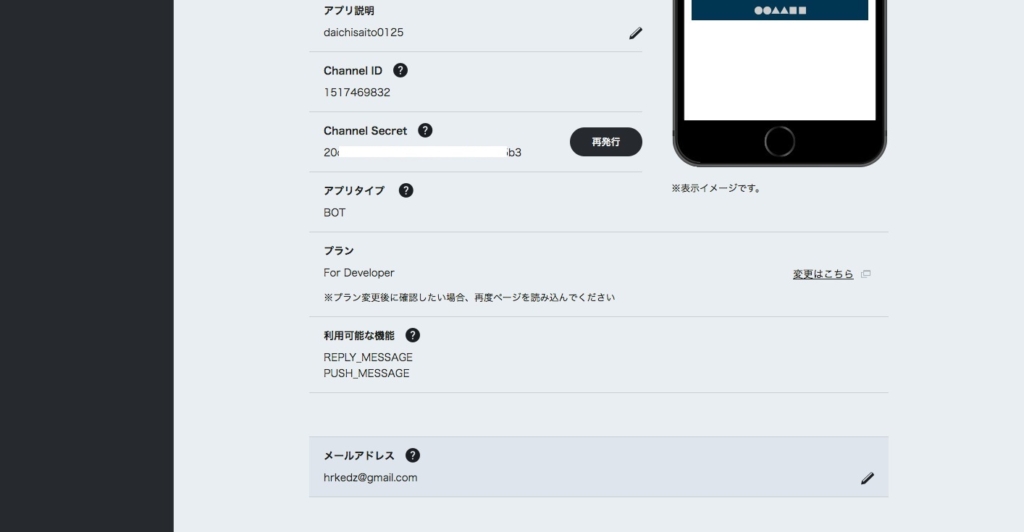
そのまま進めていくとChanell Secretとアクセストークンが記載されているのでそれらをメモしておきます。
プログラム作成
ここからはローカル環境でプログラムを作成していきます。
今回サーバはExpress(node.js)で書いていくことにしました。
プロジェクトの初期化
$ mkdir mylinebot
$ cd mylinebot
$ npm init -y
必要なモジュールのインストール
$ npm i --save @line/bot-sdk express
メインのjsを作成
$ touch server.js
'use strict';

var template = require( "./template.json" );

const express = require('express');
const line = require('@line/bot-sdk');
const PORT = process.env.PORT || 8080;

const config = {
    channelAccessToken: 'ここにメモしておいたアクセストークンを記載',
    channelSecret: 'ここにメモしておいたシークレットを記載'
};

const app = express();

app.post('/webhook', line.middleware(config), (req, res) => {
    console.log(req.body.events);
    Promise
      .all(req.body.events.map(handleEvent))
      .then((result) => res.json(result));
});

const client = new line.Client(config);

function handleEvent(event) {
  if (event.type !== 'message' || event.message.type !== 'text') {
    return Promise.resolve(null);
  }

  var responsemsg = {};
  if (event.message.text == 'ボタン') {
    responsemsg = {
      type: 'template',
      altText: 'template alt text',
      template: template.output.line_template_button
    };
  } else if(event.message.text == '確認') {
    responsemsg = {
      type: 'template',
      altText: 'template alt text',
      template: template.output.line_template_confirm
    };
  } else if(event.message.text == 'カルーセル') {
    responsemsg = {
      type: 'template',
      altText: 'template alt text',
      template: template.output.line_template_carousel
    };
  } else if(event.message.text == '画像カルーセル') {
    responsemsg = {
      type: 'template',
      altText: 'template alt text',
      template: template.output.line_template_image_carousel
    };
  } else {
    responsemsg = {
      type: 'text',
      text: event.message.text
    };
  }


  return client.replyMessage(event.replyToken, responsemsg);
}

app.listen(PORT);
console.log(`Server running at ${PORT}`);
表示用テンプレートファイルを作成
$ touch template.json
{
    "output": {
        "line_template_button": {
            "type": "buttons",
            "thumbnailImageUrl": "https://1.bp.blogspot.com/-zEKEpGCVUco/Ws2vxslzKaI/AAAAAAABLYM/B67RdLxkdkA8mylXhM8QGhXEnYxlJ-nLgCLcBGAs/s400/pose_happy_businessman_guts.png",
            "imageAspectRatio": "square",
            "imageSize": "cover",
            "imageBackgroundColor": "#FFFFFF",
            "title": "Menu",
            "text": "Please select",
            "defaultAction": {
                "type": "uri",
                "label": "View detail",
                "uri": "http://example.com/page/123"
            },
            "actions": [
                {
                    "type": "postback",
                    "label": "Buy",
                    "data": "action=buy&itemid=123"
                },
                {
                    "type": "postback",
                    "label": "Add to cart",
                    "data": "action=add&itemid=123"
                },
                {
                    "type": "uri",
                    "label": "View detail",
                    "uri": "http://example.com/page/123"
                }
            ]
        },
        "line_template_confirm": {
            "type": "confirm",
            "text": "Are you sure?",
            "actions": [
                {
                    "type": "message",
                    "label": "Yes",
                    "text": "yes"
                },
                {
                    "type": "message",
                    "label": "No",
                    "text": "no"
                }
            ]
        },
        "line_template_image_carousel": {
            "type": "image_carousel",
            "columns": [
                {
                    "imageUrl": "https://3.bp.blogspot.com/-gzgU0I0qVy0/Wwoht4KAB4I/AAAAAAABMZE/6HGXufoIhhQDiZN-RLHK0Ibx2eqkLGLIwCLcBGAs/s400/job_art_hotoke_busshi.png",
                    "action": {
                        "type": "postback",
                        "label": "Buy",
                        "data": "action=buy&itemid=111"
                    }
                },
                {
                    "imageUrl": "https://4.bp.blogspot.com/-6apuf4zJwoQ/WxvKGTFUveI/AAAAAAABMm0/SebNsibzmy0JNutXq1aSRN-gzE3QG6qngCLcBGAs/s400/job_cable_matomeru_assistant.png",
                    "action": {
                        "type": "message",
                        "label": "Yes",
                        "text": "yes"
                    }
                },
                {
                    "imageUrl": "https://3.bp.blogspot.com/-h7KLtqbR27w/Wn1V7_a7ahI/AAAAAAABKGY/EG98sfpc7cAKUGxiLQ2eDOFH1iUCE0BQQCLcBGAs/s450/hotoke_senju_kannon.png",
                    "action": {
                        "type": "uri",
                        "label": "View detail",
                        "uri": "http://example.com/page/222"
                    }
                }
            ]
        },
        "line_template_carousel": {
            "type": "carousel",
            "columns": [
                {
                    "thumbnailImageUrl": "https://3.bp.blogspot.com/-h7KLtqbR27w/Wn1V7_a7ahI/AAAAAAABKGY/EG98sfpc7cAKUGxiLQ2eDOFH1iUCE0BQQCLcBGAs/s450/hotoke_senju_kannon.png",
                    "imageBackgroundColor": "#FFFFFF",
                    "title": "this is menu",
                    "text": "description",
                    "defaultAction": {
                        "type": "uri",
                        "label": "View detail",
                        "uri": "http://example.com/page/123"
                    },
                    "actions": [
                        {
                            "type": "postback",
                            "label": "Buy",
                            "data": "action=buy&itemid=111"
                        },
                        {
                            "type": "postback",
                            "label": "Add to cart",
                            "data": "action=add&itemid=111"
                        },
                        {
                            "type": "uri",
                            "label": "View detail",
                            "uri": "http://example.com/page/111"
                        }
                    ]
                },
                {
                    "thumbnailImageUrl": "https://4.bp.blogspot.com/-6apuf4zJwoQ/WxvKGTFUveI/AAAAAAABMm0/SebNsibzmy0JNutXq1aSRN-gzE3QG6qngCLcBGAs/s400/job_cable_matomeru_assistant.png",
                    "imageBackgroundColor": "#000000",
                    "title": "this is menu",
                    "text": "description",
                    "defaultAction": {
                        "type": "uri",
                        "label": "View detail",
                        "uri": "http://example.com/page/222"
                    },
                    "actions": [
                        {
                            "type": "postback",
                            "label": "Buy",
                            "data": "action=buy&itemid=222"
                        },
                        {
                            "type": "postback",
                            "label": "Add to cart",
                            "data": "action=add&itemid=222"
                        },
                        {
                            "type": "uri",
                            "label": "View detail",
                            "uri": "http://example.com/page/222"
                        }
                    ]
                }
            ],
            "imageAspectRatio": "rectangle",
            "imageSize": "cover"
        }
    }
}
プログラムはこれで完了です。
Herokuアプリの作成
$ heroku apps:create your-app-name
Webhookの設定
LINEDevelopersに戻って、webhookに”HerokuアプリのURL/webhook”を設定してください。
Herokuにプログラムをデプロイ
先ほどローカルで作ったプログラムをHerokuにプッシュしてください。
動作確認
LINEDevelopersにQRコードがあるのでそれを使ってLINEで友達追加してください。
そしてチャットルームの画面にて
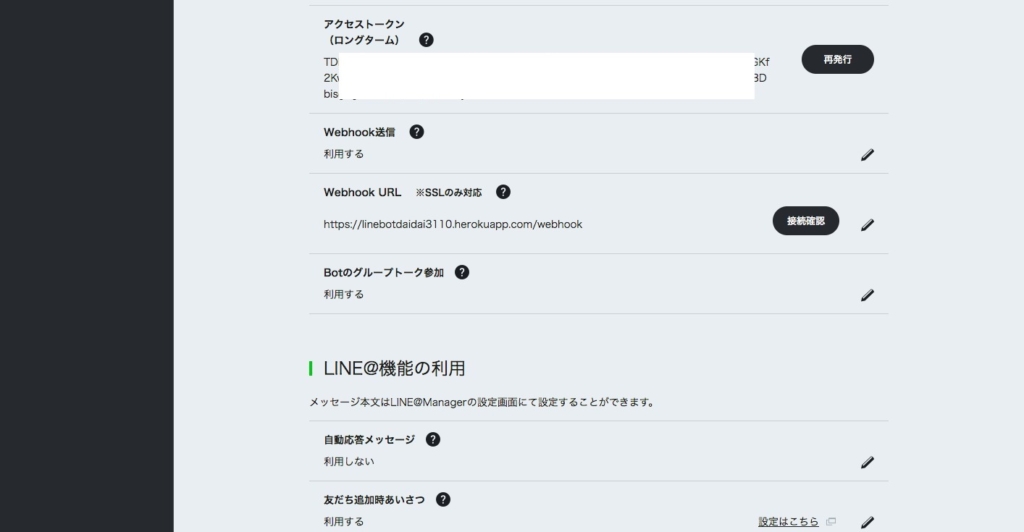
「ボタン」と入力 → ボタン系テンプレートが返ってくる。
「確認」と入力 → 確認系テンプレートが返ってくる。
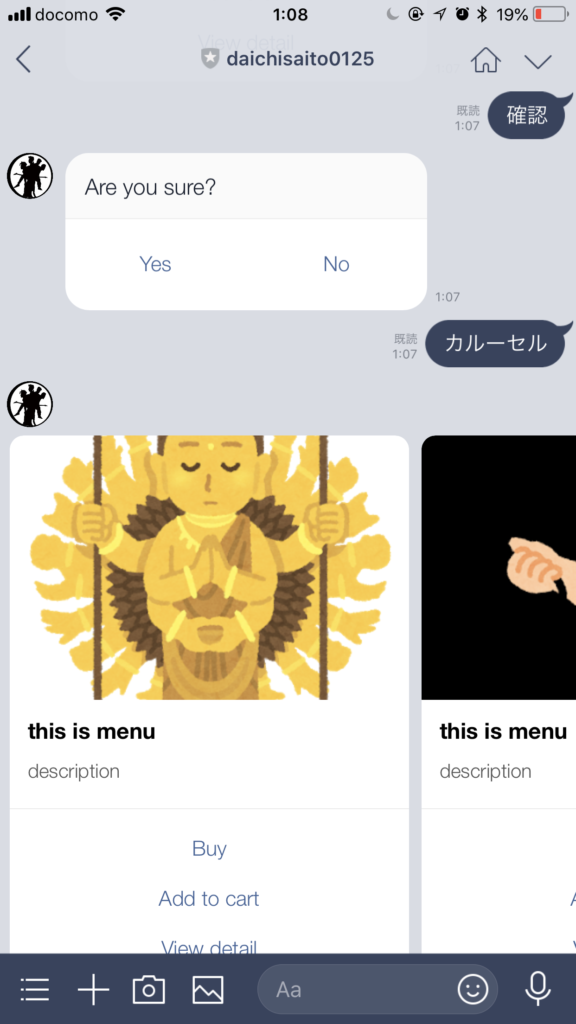
「カルーセル」と入力 → カルーセル系テンプレートが返ってくる。
「画像カルーセル」と入力 → 画像カルーセル系テンプレートが返ってくる。
という動きになります。
ボタン
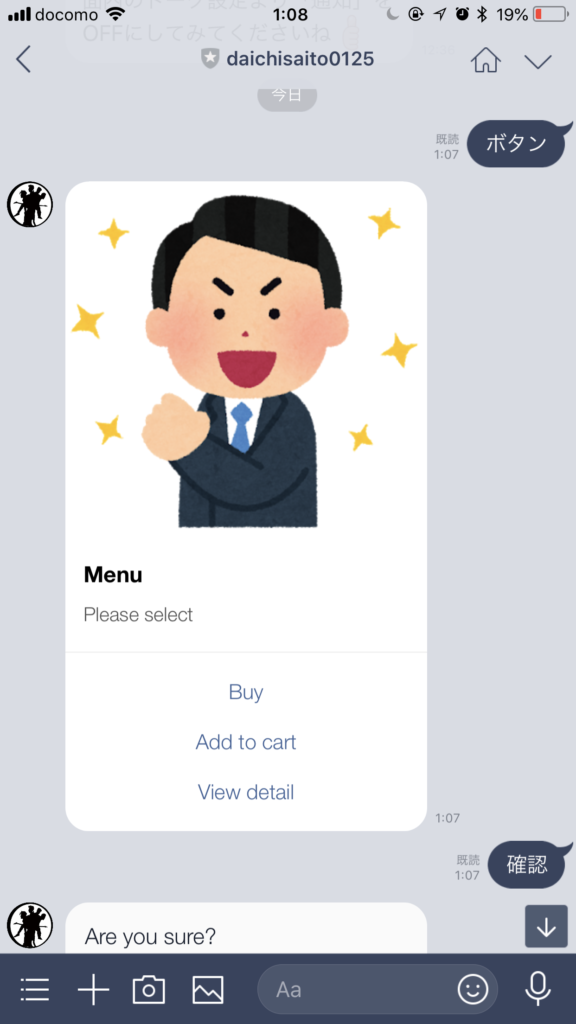
確認・カルーセル
画像カルーセル
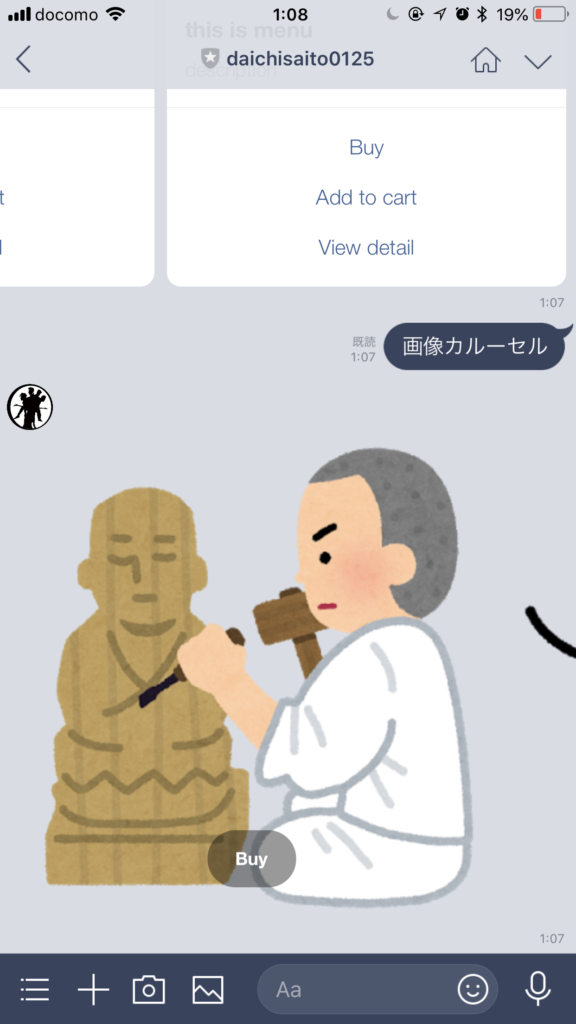
しっかり表示されました!
ちなみに上記の様なテンプレートだけでなく動画や音声ファイルも返すこともできます。
なのでいずれ音声ファイルを返して絶対音感テストのようなプチアプリを作ってみたいなーと思いました。
また、Botはグループにも参加できます。合コン終わった後のグループにBotを投下して、気になる人を選択。お互いに選択し合った場合のみお互いにだけ通知がいく、みたいなことが簡単にできますね笑 バグは許されないので作る際は要注意笑